Category Archives: 99 Projects

I’m creating 99 thinga-ma-bobs, projects, works of art, etc. etc.

99 Projects: Coen Bros Movie Magnets

Project #9: The Coen Movies Magnets.

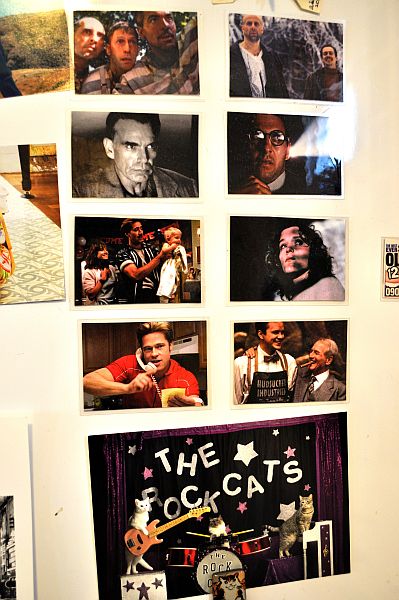
Not all projects have to be big to bring great joy. I made these magnets featuring Coen Brothers films for our refrigerator:

Refrigerator magnets of Coen brothers movie stills.

A few years ago, the Walker Art Center did a Regis Dialogue and Film Retrospective of the films of Joel & Ethan Coen. I kept the program, which had high-quality, rectangular photo stills of their films. I thought it would be cool to make magnets but I didn’t have a laminating machine.

Note: save programs or books for art exhibits you love. The production and paper are generally high quality (better than, say, saving magazine images) and will make great images for magnets!

Continue reading 99 Projects: Coen Bros Movie Magnets

99 Projects: Embroidered Portrait

Project #7: Embroidered Pet Portrait

Over a year ago, Freja and I were walking through a park and I stopped to take some photos of her. One of them always cracks me up because I’m never sure what to make of the look on her face:

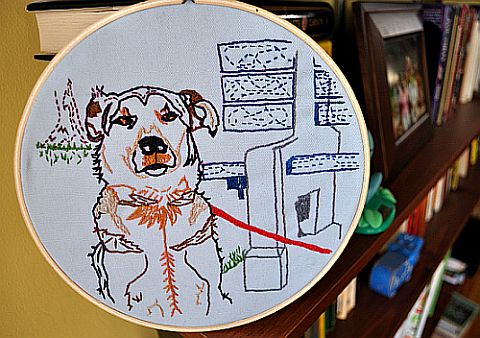
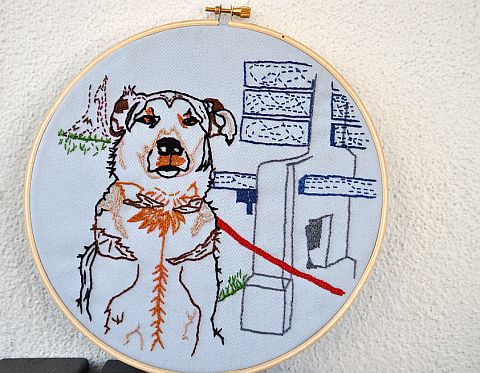
I created a collage on my bedroom wall of thrifted portraits, photos and drawings of dogs but it was missing my own dog. So I traced the photo onto tracing paper with a special pencil, ironed it so that those lines transferred onto fabric and went to work. After many hours embroidering while watching everything from Arrested Development, Project Runway and to the movie The Fly, I finally finished:

It’s definitely not an exact translation but I like the crafty, maybe kid-like quality it has. Perhaps this photo provides a better view, I can’t decide:

Now just have to get around to adding it the wall collection!

99 Projects: Wall Art

Project #6: Wall Art for Living Room

When Keith switched jobs recently, we were on the hook to give back the artwork that had been on loan from his former employer. It was a large painting that filled a fairly large space on our living room wall. I could only take a few days of looking at the emptiness before I had to think of something.

This is what we did:

1970s chic! Total cost – $20

I went to an occaisonal sale at the Cottage House on Chicago Avenue in Minneapolis. This was on the first day of the month the sale was open and it was nutty in there – a lot of women grabbing whatever they could get their hands on. The Cottage House is just that – a small house – so it was hard to manuever around all the stuff and the women with glazed eyes hugging shabby chic furniture. To the Cottage House’s credit, they really move the merch there.

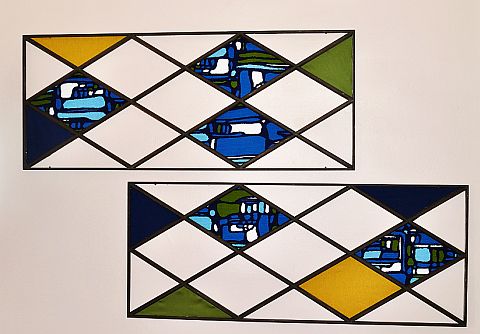
The backyard and the garage at Cottage House are also full of stuff. I found a bunch of old shutters leaning against the house and amoung them were some lattice panels for $5 each, so I bought them. The big plus is that they are super lightweight. They needed to be repaired (with wood glue at the joints) and cleaned. We decided to leave the finish rather than painting them a different color.

I thrifted the printed fabric behind the panels awhile ago – it was a great Mad Men-esque print from the 60’s that was $5. We used some solid fabrics as accents, attaching all the fabric to the back of the frame with hot glue. I broke my glue gun in the process – or rather, the glue gun tip fell off mid-glue. This is the second time this has happened to me so I think I’m done buying the $8 glue guns.

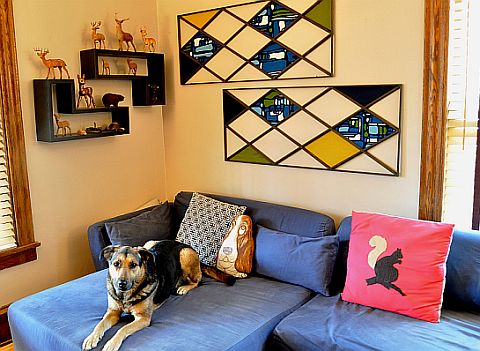
Here’s the wall art “in a room” with my fuzzy deer/reindeer collection, squirrel pillow and, of course, Freja:

99 Projects: Calling Card

Project # 5: Calling Card

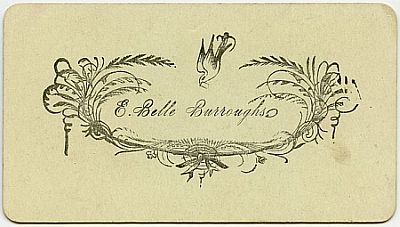
I’ve been into the idea of making a calling card for a long time. I like the idea of a simple card with just a name and a way to get in touch with someone. Not a business card, mind you, although they have their place (when I was looking at card ideas online, I came across this post with all these fab designs for business cards, some more successful than others). In the old-timey days, calling cards could be as simple as this:
Right now I am looking for a job and have no “business card” to hand out. That’s why I’m happy to have my new calling card. The last time I did have a business card to hand out, I hated that card. It didn’t say anything about me. Even the title, thought up by my boss, was embarrassing to me. The interesting thing about that card was that it became completely useless as soon as I didn’t have the job anymore – there was no “me” in that card at all. It belonged to the business.

A “calling card” or personal card doesn’t put a business or a title first, which seems counter-intuitive to the way we live now. But according to the branding and social media gurus, we should meld our business with our play, our social media accounts with our work personna – every representation of ourselves should be another piece that contribute to a concise, branded whole. What you put forward first does matter – is it the company you work for or YOU?

Calling cards are perfect for introducing yourself in a more personal way. {You can read about the history of the calling card here.]

If you’re like me (when employed) you don’t want to be in work mode all the time or worrying about your “personal brand.” Many times I’ve thought that my personal brand should just be “Messy.” I don’t want to feel that others are always evaluating what I do in my private life in terms of my “brand,” and I try not to do this to other people. What I mean is, sometimes you just want to hand people a card that has your name and contact info on it and a little hint of what you’re about.

Also, if someone hands you a business card, you can’t help but make a judgement about them based on their job. We’re only human! You now know what they do for money and, yes, it’s probably a big part of who they are but let’s hope it’s not the entire picture. On the other hand, if someone hands me a calling card or personal card, there seems to be more to discover and find out. A calling card says, “Hello, this is me. Want to know more?” while a business card, depending on your profession, can instantly put you into a box people aren’t that excited to open.

Maybe the solution is to have two cards one can hand out according to one’s discretion. What do I want this person to know about me? How do I want to be perceived by them?

Anyway, this is a long way of explaining that I finally made my own calling card to hand out to people I find interesting and want to get to know. Here it is, literally larger-than-life, in digital form:
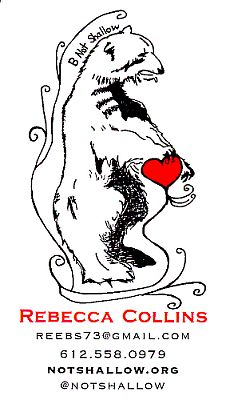
I’m not a graphic designer by any means but I knew that I wanted it to have a drawing on it to give it that old-timey feel and I wanted it to have minimal text – just options for ways to get in touch with me and/or find out more about me (this blog and my Twitter account.)

If you’re interested, here is what I did to make it:

  • First, I used an antique playing card with a drawing of a bear on it as inspiration and drew a bear of my own, using that one as a model but adding the heart and loops. I did this in pencil and then I went over it in ink. This was important to me in order for the drawing to have a sketchy look.
  • Next, I scanned the drawing and brought it into Illustrator to make it into a vector using the live trace feature.
  • I used live paint to make the heart red. I could have added more color but I didn’t want to take away from the simplicity of the drawing. Keep it simple.
  • I re-sized the bear to fit onto a standard card and then set up my card in InDesign, putting several copies of it “up” on a page.
  • I had them printed at a print shop because I didn’t want to mess around with home printing and cutting, which would have made them look a bit too homemade. Even when using a paper cutter, I manage to cut things crooked. I had them printed on extra thick card stock – thicker than the usual business card stock – and went with a matte finish instead of shiny.


It was my hope to have them printed on a letterpress but it’s not in the cards (ha ha ha – see how I did that) right now due to the expense. I did spend a lot of time looking at the sites for Studio On Fire and Lunalux, two shops in Minneapolis, and am amazed at how awesome their work is.  In fact, check out these calling cards from the Lunalux site – they are simple and chic and show that fancy graphics or drawings are not at all necessary.

I definitely aspire to letterpress cards on a heavy linen-like stock. But a gal’s gotta start where she can… and dream.

Maybe by the time I hand out all 500 of these cards, I’ll be in a position to upgrade!
99 Projects: Garden Shelf

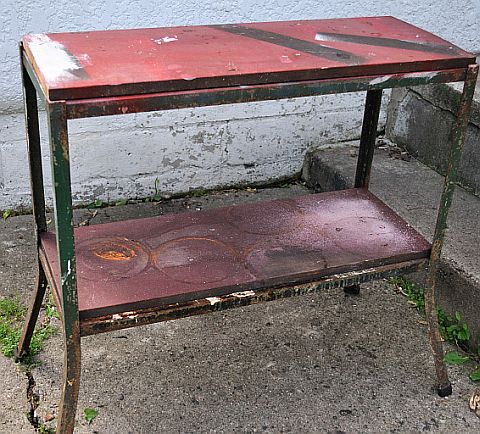
Project #4: Redo of the Abandoned Shelf In The Garage

When we bought our house, the people who lived here before us didn’t bother to clean out the garage when they left. Too much effort. Better to just leave it filled with detritus that we would deal with in the years to come.

Some stuff has been cleared out but much still remains. It’s the space that I think I’ve spent time cleaning and organizing until I go out there and really LOOK. It looks the same as it did a year or two ago. And then I might throw away one thing and split because it really harshes my mellow.

So it took much energy to haul this out of the garage into the bright light of day:

This shelf was the happy home for Collection of Old Paint Cans. One of them merrily wept its orange goo on the bottom shelf for many years. I have now gotten rid of every paint can in the garage and it left this shelf just sitting there. It is a very sturdy shelf.

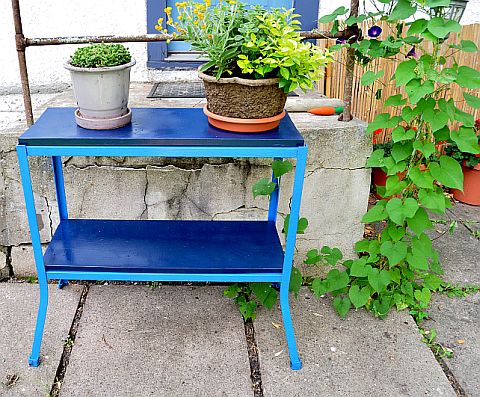
So this is what it’s doing these days, a round of sanding and several cans of spray paint later:

The metal frame was fun to sand and spray paint. The shelves of wood kinda sucked. But I love the results.

I’ve got this awful old cement “patio” and steps that really, really need to be redone but the Year of Unemployment lingers on and it ain’t happening this summer so… this is what I call a Distracting Element that draws one’s eye away from the crumbling, cracking mess.

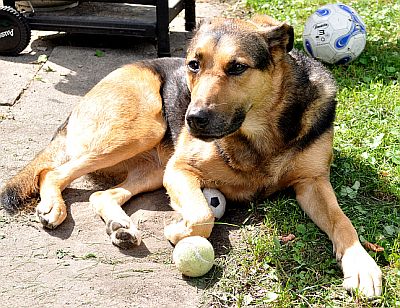
I took the above photo this morning and then I turned around and took this one:

"I good dog. Why you give bath? You hate?"

99 Projects: Gnome Terrarium

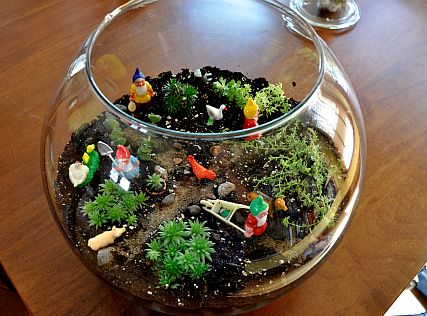
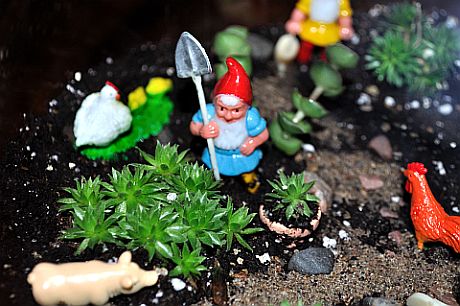
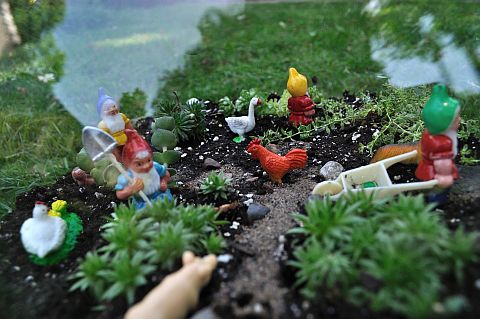
Project 3: Gnome Terrarium for my sister’s birthday

I had a bunch of gnomes that I bought a long time ago, saving them up for something. They are all holding gardening tools so this seemed like the perfect opportunity to create a gnome tableau.


The big globe/fishbowl is from the ARC thrift store and was 99 cents!

The plants are all succulents or sedum (stonecrops) from the Crassulaceae family – they store water in their leaves. These plants would not do well in a more traditional closed terrarium environment because it would get too wet. But the top is open and it will do great in a sunny spot with the occasional spray down with a spray bottle – definitely don’t need to dump water on this one!

The plants are draba aizoides, rupturewort, rosularia, sedum japonicum (“Tokyo sun”), mini hen and chicks and “jade towers.”

It will be interesting to see how big this stuff gets…

99 Projects: Prepster Pouch

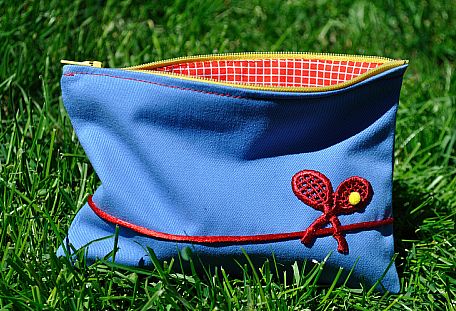
Project #2: Preppy Zipper Pouch to hold small  purse essentials (lipstick, Band-Aids, safety pins, free drink tickets, aspirin, my calling cards…)

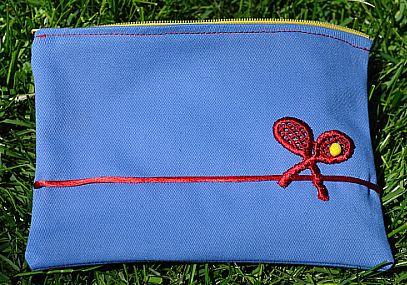
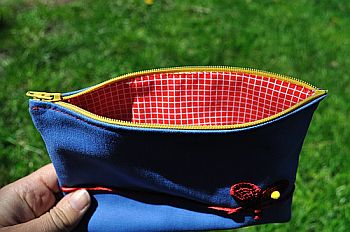
That’s my attempt at being all “Tennis, anyone?” Here’s a flat view:

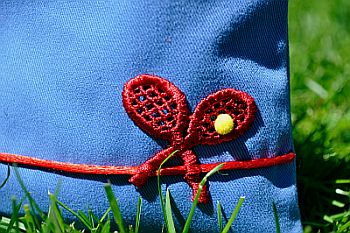
Now I’d like to take a moment to point out that although my bag is preppy, it cost very little to make. I used fabric and some trim I’ve had for years. I got the applique of the rackets at ARC for 30 cents (came with an anchor for more preppy fun) and I happened to have a package of tiny pom pom balls in a variety of colors so I used a yellow one for my tennis ball. Let me just show you a close-up:

Sun was kinda bright in the yard, huh?

Also, I went to a church garage sale and found cloth napkins that had never been used for 25 cents and cut one up to be my checked preppy liner for the bag, as seen here:

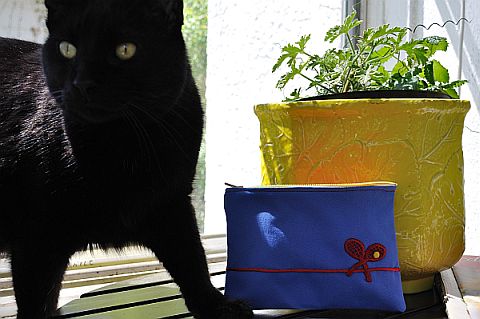
Best of all, cats like this bag and come to see what it’s all about whenever I bring it out:

Have a Preppy Day!

99 Projects: Head Shop Wallet

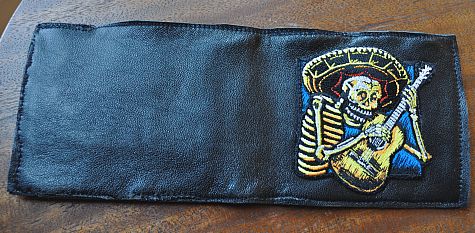
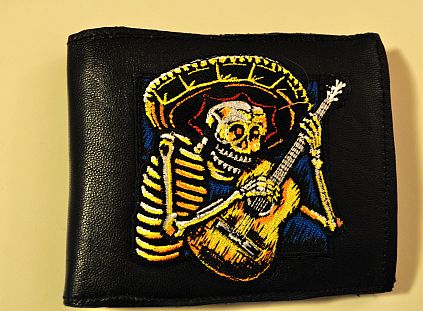
Project #1: Wallet with Skeleton Patch

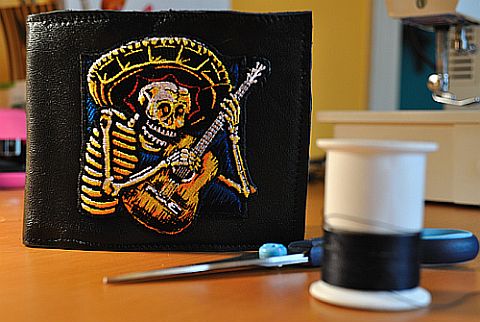
I’ve had the patch I sewed onto this wallet for a long time – ha ha ha! a skeleton playing a guitar! I knew it would be right up Keith’s alley. Except now people talk less about alleys and more about wheelhouses.

But I was never sure what to do with the patch. Finally, I decided it would probably only look good on a wallet. And I wanted to make that wallet. So I combed the Internet, which is a talent of mine, and found this tutorial. It was by far the best out of all I read and very easy. I thought it would take me a few days to make it and I was all hunkered down to sew along with tea, podcasts, the dog, etc. when I realized that I could finish it in one day. I kinda like that!

The other thing I like about this project? That you use a leather skirt to make it. Finally, an actual use for all those leather skirts I see at thrift stores. I thrifted a skirt for $8. Don’t ask me why it was so much… thrift stores can get all uppity when it comes to leather. I could have gotten a royal blue leather skirt for $4 but something told me Keith would not go for that. Royal blue leather skirts are not in his wheelhouse.

If you have any interest in making a wallet like this (the patch is totally optional!) look for a larger skirt with minimal seams – you’ll get the most leather for your thrift dollar. Don’t mess around with leather jackets and coats – too expensive even at thrifts (and by that I mean they sometimes want $20 to $30!). Although, if you got really into making these and found a sweet leather trench coat that would allow you to turn out several wallets, well, it would be worth the scratch.

[That’s cool person lingo for money.]

Here are some more photos. Sorry I’m so bad at the photos, folks. I try. I really do.

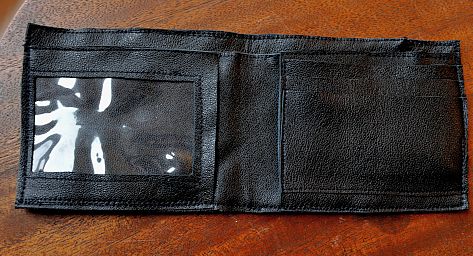
Open on one side... wonky stitching...
I cut a piece of vinyl from an old pencil case for the ID holder!
"Hey, man, you got a joint?"